
前回の記事では、Windows の cmd.exe だけで FastAPI 開発環境を丸ごと自動構築できるテンプレートスクリプトを作成しました。
- uv(Python パッケージ管理)
- FastAPI
- Ruff
- pytest
- SQL Server(pyodbc + SQLAlchemy)
- pydantic-settings
- .venv
- 株価分析アプリ向けのフォルダ構成(services / ml / utils)
今回はその続きとして、
- FastAPI を実際に起動できる最小限の Python コードを追加
- pytest でテストを通す
- GitHub に PUSH して公開する
というところまで進めます。
まだ構築が終わってないという人は、以下をご参照ください。

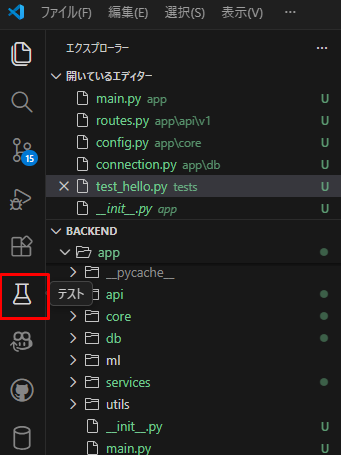
📌 最初に重要:VS Code は必ず backend フォルダを開く
FastAPI の名前解決エラーの 90% は、 VS Code のワークスペースが backend になっていないことが原因です。
正しい開き方:
stock-api-project/
└── backend/   ← ここを VS Code で開く
もし stock-api-project 全体を開いてしまうと、pytest や FastAPI が app を見つけられず、
ModuleNotFoundError: No module named 'app'というエラーが発生します。
🧩 1. FastAPI を起動できる最小コードを追加する
テンプレートで作成したファイルに、必要最低限のコードを追加します。
📌 app/main.py
from fastapi import FastAPI
from app.api.v1.routes import router as api_router
app = FastAPI()
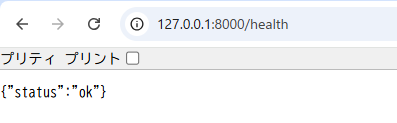
@app.get("/health")
def health_check():
return {"status": "ok"}
app.include_router(api_router, prefix="/api/v1")
📌 app/api/v1/routes.py
from fastapi import APIRouter
router = APIRouter()
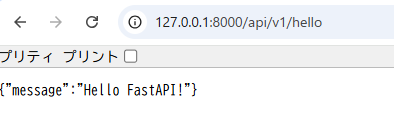
@router.get("/hello")
def hello():
return {"message": "Hello FastAPI!"}📌 app/core/config.py
from pydantic_settings import BaseSettings

class Settings(BaseSettings):
    app_name: str = "Stock API Project"

    class Config:
        env_file = ".env"

settings = Settings()
📌 app/db/connection.py
from sqlalchemy import create_engine
from sqlalchemy.orm import sessionmaker

DATABASE_URL = "mssql+pyodbc:///?odbc_connect=DRIVER={ODBC Driver 17 for SQL Server};"

engine = create_engine(DATABASE_URL, echo=False)
SessionLocal = sessionmaker(autocommit=False, autoflush=False, bind=engine)
▶️ FastAPI を起動して動作確認
VS Code のターミナルで backend に移動して実行します。
cd backend
uv run uvicorn app.main:app --reload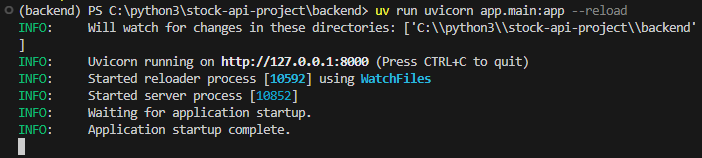
ブラウザで確認:
http://127.0.0.1:8000/health(127.0.0.1 in Bing)http://127.0.0.1:8000/api/v1/hello(127.0.0.1 in Bing)http://127.0.0.1:8000/docs(127.0.0.1 in Bing)
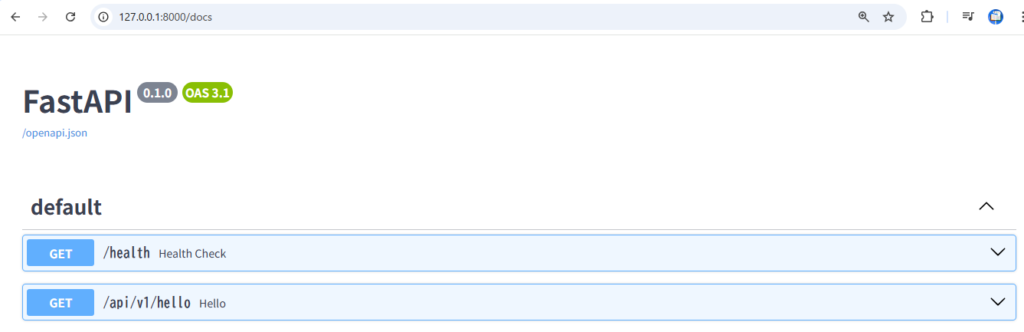
FastAPI が正常に動作していれば OK。
🧪 2. pytest でテストを通す
📌 tests/test_hello.py
from fastapi.testclient import TestClient
from app.main import app

client = TestClient(app)

def test_hello():
    response = client.get("/api/v1/hello")
    assert response.status_code == 200
    assert response.json() == {"message": "Hello FastAPI!"}
📌 pytest 実行時の “app が見つからない” エラー対策(重要)
pytest を実行すると、次のエラーが出ることがあります。
ModuleNotFoundError: No module named 'app'これは pytest が backend を Python パスとして認識していないためです。
✅ 解決方法:backend に pytest.ini を置く
backend フォルダに pytest.ini を作成し、以下を記述します。
[pytest]
pythonpath = .
これで pytest 実行時に backend が Python パスに追加され、 from app.main import app が正しく解決されます。
▶️ テスト実行
uv run pytest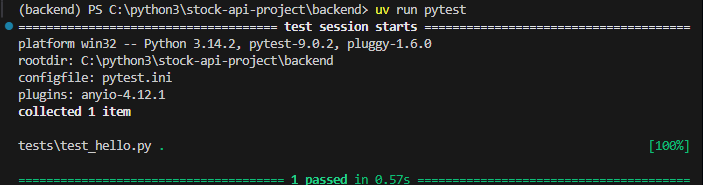
左メニューのテストからも実行できます。
🧭 3. GitHub に PUSH する
プロジェクトルート(stock-api-project)で実行します。
git init
git add .
git commit -m "初回コミット:FastAPIテンプレート"
GitHub でリポジトリを作成し、表示されたコマンドを実行:
git remote add origin https://github.com/yourname/stock-api-project.git
git branch -M main
git push -u origin main
🎉 ここまででできたこと
- VS Code の正しい開き方(backend を開く)を明記
- FastAPI が実際に起動できる状態になった
- pytest が成功
- GitHub に PUSH して公開できた
これで 株価分析アプリの開発を始めるための基盤が完全に整いました。
🌱 次回予告:株価データ取得の実装へ
次回は、いよいよ株価分析アプリの本題に入ります。
- 日経225銘柄のスクレイピング
- yfinance を使った株価データ取得
- services 層にロジックを実装
- API から呼び出せるようにする
ここまで進めば、アプリとしての形が見えてきます。

コメント